Categories
Money money money...
Could we help you? Please click the banners. We are young and desperately need the money
Last updated: June 11th 2025
Categories: Databases, MySQL, Wordpress
Author: Tim Fürer
WordPress: Installation with XAMPP
In this post, I'll take you through the basic steps of setting up WordPress with XAMPP.
Downloading required Files
First, download WordPress and install XAMPP:
Setting up XAMPP
Head into your XAMPP installation directory and move the WordPress directory you've downloaded to the "htdocs" (default) directory. You may rename the WordPress directory to whatever you prefer.
Inside the XAMPP application, start up Apache and MySQL.
Now, click on the "Admin" button for MySQL. Alternatively, you could also enter "localhost/phpmyadmin" into your browser. Either method will lead you to PhpMyAdmin, a visual interface for easy interaction with MySQL. It comes with pre-installed with XAMPP.
Head over to "Databases" and create a new one.
Installing WordPress
- Enter "localhost/mywebsitename" into your browser.
- You should now be on the WordPress setup page.
- Select your preferred language.
- Enter your database credentials as shown in the example screenshot.
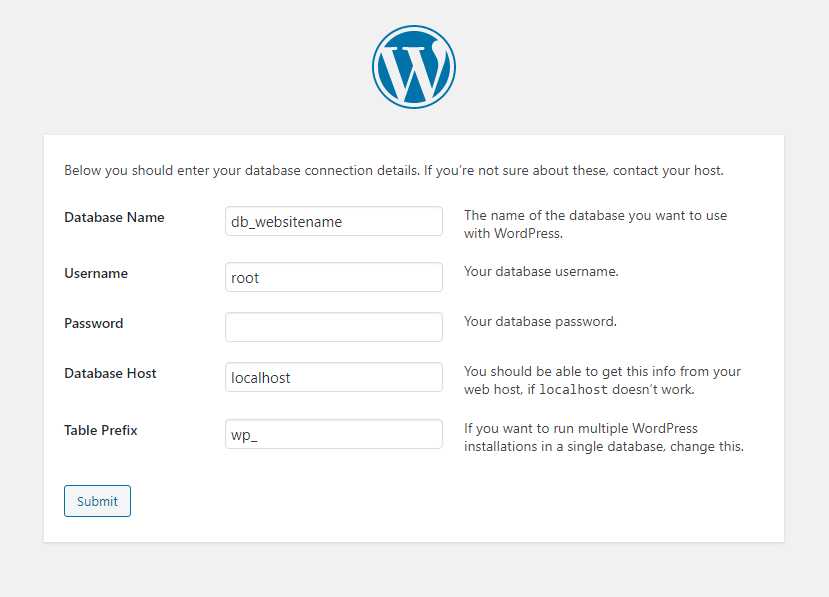
The user "root" does not have a set password on default, so you can leave that empty.
It will now ask you to fill in information such as "Website Title," "Username," "Password," etc.
Great, WordPress is now installed. Go ahead and log in with the username and password you've chosen earlier. You'll then be taken to the WordPress dashboard.