Last updated: December 11th 2023
Categories: IT Development, Laravel
Author: Miljan Puzovic
How to install Laravel in Homestead from scratch?
DISCLAIMER - READ BEFORE CONTINUING
Update as of February 2022: We have transitioned away from using Vagrant/Windows setups. Our entire workflow now operates on Linux Mint. For straightforward web development projects, particularly those involving WordPress, we utilize Local WordPress software. In the realm of Laravel-based web applications, our preference has shifted to Laravel Sail, integrated with Docker. This combination has proven to be not only rapid and reliable but also impressively versatile.
We strongly advise against following this Laravel Homestead guide any further. We keep it here for archiving reasons only. Our experience over the past few years with Laravel Homestead and Vagrant in a Windows environment was marked by consistent issues and performance lags.
We are confident that transitioning from Windows to Linux and adopting the aforementioned software solutions will significantly enhance your development experience and lead to greater satisfaction in your projects.
INSTALLATION
For the starters, we need to install some software.
Install Composer
Composer can be downloaded from this page and it's installation process is pretty straight forward.
Install Oracle VM VirtualBox
VirtualBox can be downloaded from this page, of course choose latest Windows version.
Install Git
Git can be downloaded from this page.
Installing Homestead
After we have installed all required software, we can start with Homestead installing process.
- Let's create a folder called "myapp" directly on C partition. Enter that folder and right-click inside it. Choose an option "Git Bash Here".
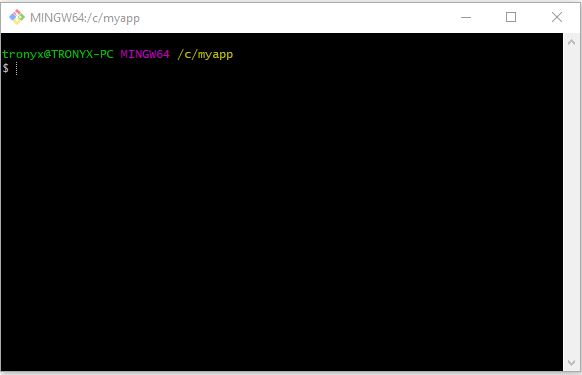
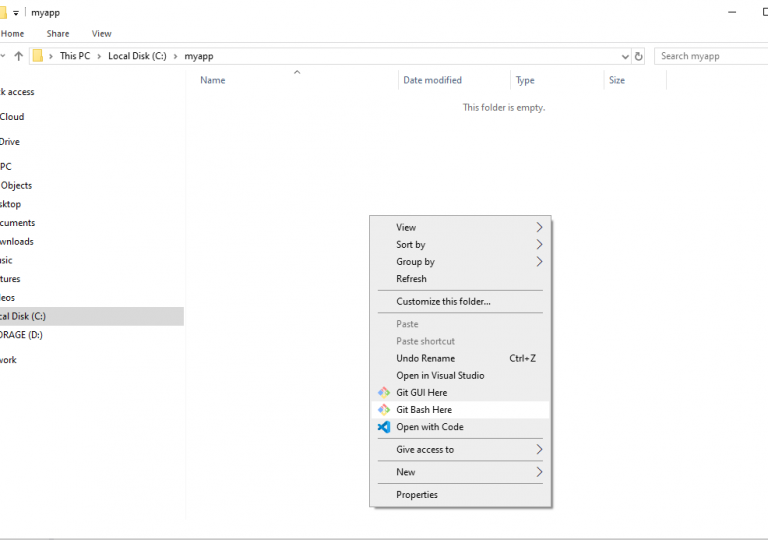 You will get a command like like here:
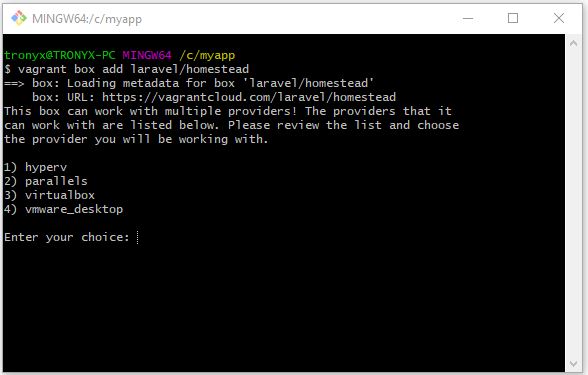
- In command line, write a following command and press Enter
vagrant box add laravel/homestead
- After few moments you will need to choose the provider, so select VirtualBox by typing 3 and pressing Enter.
- After a while, enter following command:
git clone https://github.com/laravel/homestead.git
That will create a new folder named "homestead" inside of your "myapp" folder and it will download Homestead inside of it.

- Now, if you're still in myapp folder in CMD, enter
cd homestead
in order to enter a "homestead" folder, and after that enter this code
git checkout release
- In order to create your Homestead.yaml file enter this line
bash init.sh
If everything is ok, you will get a message "Homestead initialized!" and Homestead.yaml file will be created inside of "homestead" folder.
- Virtual server will use ssh keys so we need to create them by using this line
ssh-keygen -t rsa -C "you@homestead"
We can skip this step but then we need to comment out the code (authorize and keys lines) in Homestead.yaml.
- It really depends of your requirements ho you would setup this file but lets say that a following example will cover you for the starters.
---
ip: "192.168.10.10"
memory: 4096
cpus: 2
hostname: myapp.local
name: myapp.local
provider: virtualbox

authorize: ~/.ssh/id_rsa.pub

keys:
- ~/.ssh/id_rsa

folders:
- map: C:/myapp/app
to: /home/vagrant/app
type: "nfs"

sites:
- map: myapp.local
to: /home/vagrant/app/myproject/public

databases:
- myappdb

ports:
- send: 80
to: 80
- send: 8080
to: 80
- send: 3000
to: 3000
- send: 8025
to: 8025
Folders and sites settings are changed so now we are telling vagrant where to look and how to map our project. Notice that map line under folders ends with /app. That folder doesn't exists yet but that's actually our future Laravel project(s) folder. So we are mapping that route to match /home/vagrant/app inside of virtual machine and under sites we are mapping a URL basically and a route where this URL will point to in virtual server. There we have also used new part of the path myproject and that would be our first Laravel project which we are going to create later. Database name can remain as it is but we renamed it to myappdb.
- In your hosts file (under C:\Windows\System32\drivers\etc\hosts) add the following line
192.168.10.10 myapp.local
so your Laravel app can be accessible through https://myapp.local URL.
- Start vagrant by entering this line
vagrant up
Installing Laravel
- Enter the following line to download Laravel installer using Composer
composer global require laravel/installer
- Create a folder named app in myapp folder and navigate to it in CMD.
- Enter following line
laravel new myproject --auth
This will create a folder myproject insider of app folder and install Laravel inside of it. Parameter --auth is optional and it will create for you UI for user login, register, password reset etc.
And that's it, now you have your first Laravel app. How to connect to that database? Inside of the folder myproject you will find a newly created .env file. Open it and change following lines
DB_CONNECTION=mysql
DB_HOST=127.0.0.1
DB_PORT=3306
DB_DATABASE=myappdb
DB_USERNAME=homestead
DB_PASSWORD=secret
Now youre good to go. In case that you want to access this database with some external software (.i.e. MySQL Workbench) you would need to use port 33060. If you wan't to immediately try registration and login, first you need to run all migrations (which will create required tables in database).
Type
vagrant ssh
then navigate to app/myproject and type
php artisan migrate